
Hope you are all doing well today!
I have been busy sewing together Drunkard's Path blocks. They are a bit tedious to sew but do go together fairly easily. The pinning is the tedious part! Here are the steps I took to sew them together:
(Note: I cut out my blocks using the 4 1/2 inch Drunkard's Path die from Accu-Quilt. The finished size after sewing is supposed to be 4 inches, but I ended up squaring them up to 4 inches. The finished size after sewing will be 3 1/2 inches)
1. Match center tabs on the cut dies. Pin at center with the larger piece (concave piece) on top.
 |
| Pin at center tab from larger concave side. |
2. Using a Hera marker, I made creases to mark the center spots between the edge and the center tab (pin). You could also finger press or use your fingernail to make the creases. Do this on both sides of the block.
 |
| Mark creases with Hera marker or finger press |


3. Place a pin from the concave fabric piece through the creases, matching up the creases on the smaller (convex piece) back piece. Don't finish pinning through the creases completely at this point.
 |
| Place pins at creases from larger concave side. |
4. Pin the ends, placing a pin on the edge to sew, matching the corners. I also place a pin on the side to help keep the block straight while sewing.
 |
| Pin the ends at both sides. |

5. Place pins in the in-between spaces. Complete the pinning of the creases, too.
 |
| Place pins in the in-between spaces. Complete pinning at the creases. |
That's a lot of pinning! It is worth it, though, to get a good result.
Then sew together with the larger piece on top. Sew a quarter inch seam. I use my quarter inch foot for sewing, and also line up with the marks on my machine. I sew off of a piece of scrap fabric to get started. Pay attention to your starting and ending spots, to make sure the corners align. If they are off later, you can put them aside to re-sew the corners (something I have had to do a bit). You can chain piece blocks together at this point to save some time.
 |
| Sew together with larger concave piece on top. |
 |
| Chain piece if you like to save time. |
Press blocks to the darker fabric. I set the seam first with the iron (setting from the side you wish to press towards). I used my mini-Oliso iron, and it works great!
 |
| Press your seam to the dark side (this photo was taken after squaring up the block, see below how I squared up the blocks) |
 |
| Press toward the dark side! |
Then to have nice square blocks, I squared them up using a ruler and rotary cutter. Square by using the smaller convex block as your guide. I decided to square to a 4 inch block size before sewing. I put some washi tape on my ruler to make it easier to line up the blocks.
 |
| Square off using the smaller convex piece as your guide and starting point. |
 |
| After edges on left side have been trimmed. |
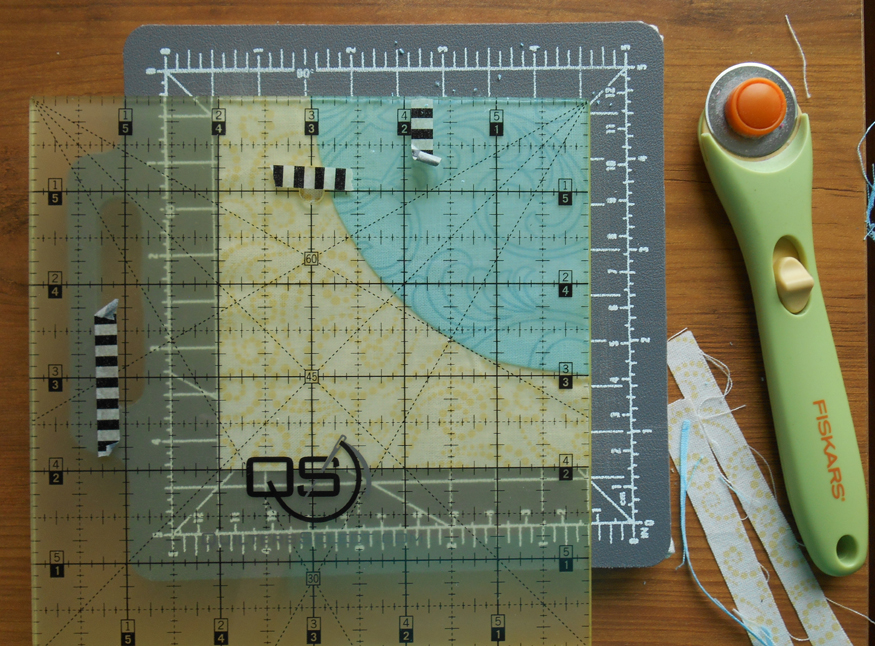 |
| Rotate your mat and trim the other 2 sides. |
 |
| The squared off block, squared to 4 inches x 4 inches. |
I haven't decided on a final layout, but here are some photos of what I've arranged on the design wall so far. I am leaning towards the circular arrangement, with maybe some blocks or strips placed between the Drunkard's path block. May let myself play with it a bit first!
 |
| Diagonal arrangement |
 |
| Circular arrangement |
I had put off trying out this die! I will bravely sew curves now and will continue to add them to my projects! Hope you will give it a try too!
Blessings,
Denise A. Buchwalter-Losczyk


