Monday, December 2, 2019

Knitted Pillow Cover update and instructions!

Greetings!

Where did the months go! It was busy with gardening during the Summer months. I have been working on projects, though not always posting about them here on my blog. I am ready to start sharing again!

I think that is one of the best things about creating art and crafts - sharing our knowledge and creativity with others. The work really isn't complete until it has been shared. It is good to express ourselves, but we can enrich our lives by sharing our creativity with each other.

My last post was about creating a Knitted pillow cover, using Lion Brand Homespun Yarn. I did try Tunisian crochet stitches also, but the knitting looked the best with this yarn. I used one skein of  the Fiesta yarn colorway, (it is a variegated yarn), and part of a ball of purple Homespun yarn I had left over from a previous project. (I forget the name of the purple colorway.) 

Lion Brand Homespun is a Bulky weight yarn, which is 98% polyester and 2% acrylic. It is machine washable and dryable. It makes very cozy projects, which are nice for cold evenings. The yarn is also made in the U.S.A.


Knitted rectangle
Finished pillow cover front

Finished pillow cover back

I finished my project, and here is the stitch design I decided on and instructions for the pillow cover:

Materials

Size 10 1/2 inch circular needle

1 Skein of Lion Brand Homespun Yarn, in your preferred colorway.

2nd skein of Lion Brand Homespun Yarn in a second colorway. (you will only use part of the 2nd colorway).

(If you choose to make the pillow in one colorway, you will need 2 skeins of yarn, since it uses a little more than one skein of yarn.)

3 - 1/2 inch buttons
Sewing thread and hand sewing needle

Tapestry needle

Instructions

Cast on  46 stitches, which equals approximately 15 inches. 
(I didn't worry about gauge too much in this project, just made sure it fit the pillow I wanted to cover. 
   Gauge of my finished project gauge measures 12 stitches across 4 inches in stockinette stitch. You can adjust your needle size to get the same result.)

I first knit 4 rows of the purple yarn. I interspersed stitch pattern rows of the purple yarn through out the pillow, you can do this, or use just one color of yarn.

Finished pillow top edge with button closure.
I used the following sequence of stitch patterns, changing each pattern when the coloration on the yarn changed. This gave the finished project a bit of a woven look:

Seed rib stitch pattern - 1st row knit, 2nd row *p1, k1 Rep * to end (repeat pattern until yarn color changes)

Stockinette stitch pattern - 1st row knit, 2nd row purl (repeat pattern until yarn color changes)

Seed rib stitch - (see above, repeat pattern until yarn color changes)

Stockinette stitch - (see above, repeat pattern until yarn color changes)

Double Moss stitch pattern - 
1st row - K1, *p1,k1 Rep* to end,
2nd row - P1, *k1, P1 Rep* to end
3rd row - P1, *K1,P1 Rep * to end
4th row - K1, *p1, K1 Rep* to end
(repeat pattern until yarn color changes)

Garter stitch - Knit across row (repeat pattern until  yarn color changes)
Double Moss stitch pattern - (see above, repeat pattern until yarn color changes)


Garter stitch - (see above, repeat pattern until yarn color changes)

Double Moss stitch - (see above
, repeat pattern until yarn color changes)


Stockinette Stitch - (See above, repeat pattern until yarn color changes)

Continue the pattern repeat until the rectangle measured approximately 30 inches. Change to purple yarn (in seed rib stitch) and knit about 2 inches in length. To create a finished edge, switch to garter stitch, using the purple yarn, for the last 2 rows of the pillow cover. This created a rectangle approximately 32 inches long.

You can measure against the pillow you are covering, if needed. The pillow I covered is 15 inches square on front and back. 

I allowed 2 extra inches to create a flap that buttons on the back of the pillow. I used the purple yarn for the last 4 rows (approximately 2 inches) of the pillow, to create the flap closure. 

I was going to knit button holes, but then realized I had 1/2 inch buttons that would fit through the stitching on the pillow.

After knitting the rectangle, I "blocked" my knitting by lightly steaming it with my steam iron, on a low steam setting. This helped it lie flat on the edges.

Next, using a tapestry needle, sew in your yarn tails.

I hand stitched up the sides of the pillow wrong sides together using a length of yarn left over. I also used some thread for stitching it closed on part of the sides. The stitching disappeared nicely into the bulky yarn. 

I sewed on 3 - 1/2 inch purple buttons on the beginning edge of the pillow, placing one in the center, and one on each side of the edge. The flap of the pillow was then able to be buttoned closed, by using the openings between the stitches as "button-holes".

Put cover on pillow and button up the flap!

I hope these instructions are easy to follow. The basic idea is to change the stitch pattern as the color in the variegated yarn changes. You can use these stitch patterns, or try another combination!

It was fun to knit, and I need to knit another one for our living room! Then maybe a matching blanket...

Leave a comment if you like, would be nice to hear how you like this project!

Happy knitting! Stay warm this season!

Denise Buchwalter-Losczyk



Sunday, May 19, 2019

Knitting and Tunisian crochet today

Happy May!

Have been busy practicing some machine quilting, and watering container garden plants in the evening.

Thought I would share some of my knitting with a little Tunisian crochet added in. I decided to design my own pillows and Afghan (throw) using Lion brand Homespun yarn which I was lucky to purchase on sale. It was a real deal at $1.00 per skein for 10 skeins! I'm using the Fiesta colorway, which has multi colors in it and will coordinate nicely with our living room. Good for chilly nights!

I've started the design process by trying out different knitting stitches using size 10 needles, then size 10 1/2 needles. (I tried out basket weave, moss stitch & double moss stitch, also a bobble stitch, which I took out, since the stitch definition wasn't as clear as I would like, due to the bulky yarn.) Now I'm trying out Tunisian Simple stitch using a 10 1/2 size crochet hook.

Sample Swatch in process.

Swatch close-up.


Will post an update later with the pattern I decided on. It is fun taking the time to try out the stitches.

Have fun creating!


Denise Buchwalter-Losczyk

Friday, April 26, 2019

Good News - Quilt accepted in Lancaster QuiltFest Show!

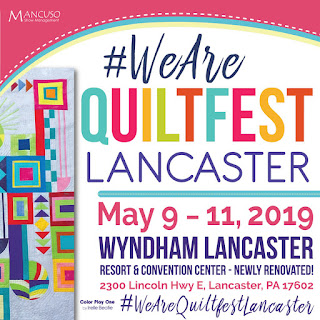
I have good news to share! My "Holiday Banner" quilt has been accepted in the 2019 Lancaster Mancuso Quilt Fest. If you are in Lancaster you can stop by and see it along with other beautiful quilts which will be on display. I've posted some photos so you can take a look, in case you can't make it to the show! The theme of the show was "Throwback Quilts". This is an earlier quilt I completed in 2013. I am just getting back into entering shows again, so I am very happy my quilt was accepted.


Detail: "Holiday Banner" Wall hanging, 
by Denise Buchwalter-Losczyk, copyright 2013.


Full View: "Holiday Banner" Wall hanging,
 Denise Buchwalter-Loscyzk, copyright 2013.
Happy Creating,

and Many Blessings,

Denise A. Buchwalter-Losczyk


Sunday, April 14, 2019

Pecan Tree Quilt Project

Happy Spring everyone!

Today I'm sharing some photos from one of the projects I've been working on. I used to work on one project at a time, but lately I've been working on different projects, off and on. It is a different approach but it is enjoyable in its own way!

Here are some photos from my Pecan Tree in Winter project:

It started with a drawing I made from my studio window of our Pecan tree during the Arizona winter months. Here is a photo of our Pecan and Pear tree.  (I edited out the Pear tree in front, and only included the Pecan tree, also the drawing was made at a slightly different angle.)

Winter pecan and pear tree in our yard.


Here is a photo of the drawing I made. I first made a pencil drawing, then traced it onto canvas, using black and blue fabric markers. I plan to add machine needle felted embellishment, and perhaps some stitching on top of the design. I'll then cut out the tree portion and applique it onto a background.


Black and blue drawing on canvas.


I've been working on a sky background using hexies (English paper pieced hexagons).


Some of the hexies laid out on my cutting table.


Close up of the hexies (hexagons), I used snowflake 
fabrics, hand painted fabrics, and will also 
use some blue solids with a texture to them.


I'm planning to add some shadows on the ground, as well in the design. We will see how it all looks when it is completed! Also, some additional details, which I will share as it is completed.

I enjoy imagining a design, and bringing it to fruition! 

Hope you enjoy seeing my progress, 

Happy Creating,

Denise A. Buchwalter-Losczyk


Monday, April 8, 2019

Gardening and Apple Core Block project

Good Afternoon!

It has been busy here lately! Not so much with art and quilting, but we have been busy in the garden. Starting new seeds, and preparing garden beds.

Here is one of my favorite new things in our yard/garden:

Strawberry Pyramid - we ordered a kit from Burgess.com, though you can find it at other nursery sites and other catalogs, also. The kit came with the aluminum border, and with a hose sprinkler hook up. My husband put it together for us. (though I am the strawberry lover in the family!) 

This is an early photo, the strawberries have started to grow, and a few even have flowers. I'll post an updated photo later on. 

We put screening down first to keep the gophers out, then a layer of cardboard and mulch, to deter weeds. Then we purchased good soil to help the strawberries thrive. We planted an everbearing strawberry assortment of Eversweet, Ozark Beauty, Fort Laramie, and Quinault berries. I am excited about the Eversweet Strawberries, as they are said to do well in temperatures over 100. Hoping it will be a nice strawberry patch for years to come.

Strawberry Pyramid


Here is project that I started on, but have scrapped for the meantime! I cut the fabrics out using my Brother Scan n Cut DX electronic cutter. It is an Apple Core table runner. I used small blocks since I had 5 inch charm squares, with apple print designs that I wanted to use. The apple print fabrics were from Benartex, I included other fabrics to complement them. The blocks were small, so I had difficulty piecing them. (I will try piecing larger apple core blocks in the future, and that should be much easier!) I will most likely applique them to a background in the future to make a table runner. The pieces are living in my scrap box for now, until I feel motivated to pick them up again!  The block was one of the built in designs that came with the cutter. I do like how the fabrics look together.

Apple Core Patch Table runner project

Close up Apple Core Blocks

Fruit Tree Blossoms in our yard


Last is a photo of some tree blossoms in our yard. I can't remember if this is from our Almond or Fruit trees. Many are blossoming now! It is definitely feeling like Spring here!

Happy Spring to everyone! Hope you are enjoying warmer weather, and a nice Spring season.

Blessings,

Denise A. Buchwalter-Losczyk

Thursday, March 14, 2019

Postcard project update!

Just a quick post today! Here is a photo of my completed 4 inch x 6 inch postcard quilt for the Quilting Arts "Tempus Fugit" (Time Flies) Reader Challenge.

The bird design is from a woodblock print I made as a teenager. Time has flown, and many decades later I am still creating!

The completed quilted postcard, using Sulky 
metallic threads, hand embroidery, 
mulberry paper for binding. Also, some 
yellow-gold ink marker.


Happy Creating,

Denise A. Buchwalter-Losczyk

Monday, March 4, 2019

Project update

Here is an update on one of the many projects I have been working on. This one is due in April, so I will be busy finishing it up this month. It is my entry for the Quilting Arts "Tempus Fugit" (Time Flies) Reader Challenge, it is a quilted textile postcard for their 100th issue.

I used an image from a woodblock print I made as a teenager as the base for the design. Hope you enjoy seeing my progress. 


Postcard size quilt sandwich (muslin backing, cotton batting,
 and printed quilt top) ready for quilting and embellishment.


Project with quilting done on sit-down machine, with Sulky metallic threads, color added with permanent yellow marker, and text stitched with vintage DMC embroidery threads. (thread is in excellent condition, from the 1950s, I believe, and found at a sale. I love the sheen it has!)

Back of my project, to get a glimpse of the quilting. I plan to add a plain backing over this back, so it can be written on.


It is starting to feel like Spring here today. We even flew some kites in our backyard!


Flying the Snake kite I purchased in Seattle in the 1980s! 
Nice to have space to fly. Shadow is my husband taking the photos.


Enjoy creating and preparing for spring,

Many Blessings,

Denise A. Buchwalter-Losczyk

Sunday, February 10, 2019

Projects in Process in my Studio

I haven't been in my studio as much as I would like these days. Have been busy with other day to day things. I have managed to get a little bit done.

I am planning to create some projects using images I have printed to Lesley Riley's TAP (Transfer Artist Paper). It is transfer paper that makes a very sharp, bright image on fabric. It can be used to transfer images onto other surfaces, also. Since I mostly work with fabric, I am using it to transfer images to fabric. I have printed up some images on the TAP supply I had in my art supply stash. I ended up with images printed in both directions, since I forgot to flip the image on my computer screen before printing! Something to remember when working with transfers. (very easy to forget!) I plan to make good use of all of the transferred images. Unfortunately the TAP product is no longer being made, so I will have to make the most of my little supply!


Images printed onto TAP (Transfer Artist Paper). 
The one on the upper left is of a Monarch butterfly
on our Cosmos plants. The bottom right photo is one 
of our ancestral homes in Ireland. I believe it is no 
longer there, but this image of it has always
sparked my imagination. A good starting 
place for a project!


Image of our ancestral home in Ireland. It is printed
on vintage linen, I believe from the 1950s, 
found at a sale. The linen was new, with sizing
still in it. After washing it is a bit wrinkled. It is off white
with a bit of texture. This image has always sparked
my imagination, a good starting place for a project!

Images transferred to Cotton Prepared for Dye fabric.
An iron, used in combination with my ironing board,
was used to transfer the images. A Teflon protection
sheet could also be used as extra protection for
your iron, though I didn't use the Teflon sheet this time.
 
I like using the PFD fabric, but the TAP transfers can 
be applied to other surfaces, as well.


Bird wood cut image transferred to PFD fabric. 
This is from a wood cut I made in my teen
years (quite a while ago now!) I have been wanting
to create something with the image. I plan to use it to 
create a post card for the Quilting Arts Magazine
"Time Flies" Reader's challenge, which is in celebration 
of their 100th issue. It seems like an appropriate
image for the challenge.


I am happy I have gotten a little bit done, even though it is not as much as I would like! At least I have a start on some new projects.

Sometimes just finding a little bit of studio time leads to the eventual completion of projects. (Created in bits of time, rather than all at once!)

Wishing you good use and enjoyment of your time,

Many Blessings,


Denise A. Buchwalter-Losczyk