Saturday, March 4, 2023

Happy March and some exciting news!

 Hi!

I've been busy in my studio and haven't posted in a while, though I have shared some videos I have been watching on my blog. I like watching Sulky's Sew What? show and also Sewing Machines Plus shows on Youtube. They are a fun way to learn some new things and be connected a bit!

In November and December of last year (2022) I had 2 projects accepted by publications, so I was busy with that. The first project was for Love of Quilting magazine and the second one was for Quiltmaker magazine.

I just received the advance copy of the May/June Love of Quilting magazine, and the project I submitted looks great - I am also feeling inspired by their cover quilt on this issue! I will be writing a blog about it soon.

Here are some of my first projects of the year (I will write about the first one in this blog, and then follow up in a 2nd blog):

In January I worked on a New Year's Eve Sew Along project I participated in with Sulky.com. It is the Sally Tomato Smith Tech Organizer. I was busy New Year's eve, but was able to start and finish the project in January. There was a kit available using Faux leather, but I chose to use cork for my project and I was able to use materials I had on hand for the rest of the project. With the project you get pdf instructions, a video you can access on Sulky.com (it is kept in your account so you can access it after completing the project, if you would like to make additional organizers).  The project price also came with 5 beautiful embroidery designs, which included 2 beautiful large butterfly designs. The designs are what convinced me to sign up! You can still access the event recording on the Sulky educational site at: https://sewingonline.sulky.com/. It is listed under Special Events (scroll down!). 

Here are some photos of the project I made:

Closed organizer - I used one of the butterfly embroidery designs,
the monogram is from lettering on my Bernette B79 embroidery machine


Open organizer - The Enjoy the Journey embroidery is from the Sew Along, I added a hummingbird from designs on my machine, also some decorative stitching from my machine. I lined the inside of my organizer with purple cotton batik fabric. I also simplified the pocket on the right (in the pattern it is divided and has card slots). The right side has a sleeve for a tablet, the left has a zippered pocket.


View of the left side


View of the right side


Organizer without notebook inside. I used left over mask elastic for my elastic notebook holder. I braided the elastic to give it a nice look. (I had purchased a large supply, so now I am having fun repurposing it! It was on sale when I bought it!)


Closed organizer.


I'm looking forward to using this organizer. I plan to use it to hold a tablet and some writing and drawing supplies. It was fun to make. The project has very small seams (1/8 inches). I found marking the seam lines with a disappearing ink pen made it easier to sew them. The rest of the project is fairly easy and you just have to take your time to make it turn out nice, one step at a time! I liked participating for the feeling of accomplishment you get from trying something new.

There are many great educational offerings on the Sulky.com website, check them out to see what you can learn to do! Many are free or low cost offerings. There are also kits and great supplies available for the projects.

Happy 2023, Year of the Rabbit everyone!

Blessings,

Denise A. Buchwalter-Losczyk


Sunday, September 4, 2022

Update - Quilt completed!

Hi!

Happy September! Hope you are all doing well. It is still very hot here, but we are starting to look forward to the cooler weather.

I recently finished my "Black and White and Read all over" quilt. I wrote about it in an earlier post this year - back in February! You can read my earlier blog to find out more about this AQS pattern. 

I finished quilting it on my Qnique 14+ mid arm and frame. I used my own free hand and ruler work quilt designs; it was fun to quilt. I used Superior Threads Rainbow Black and white variegated 40 wt. Trilobal Polyester on the top, and Wonderfil Invisafil IF718 100 wt. thread in the bobbin. I also added a border and some hand sewn yo-yos, with fabric inserts. I am very happy with it and excited to send it to its recipient. 

Here are some photos:

Full view - Disappearing Nine Patch - Titled: "Black and White and Read all over"


Detail of quilt


Detail of quilt border with fabric yo-yo with insert


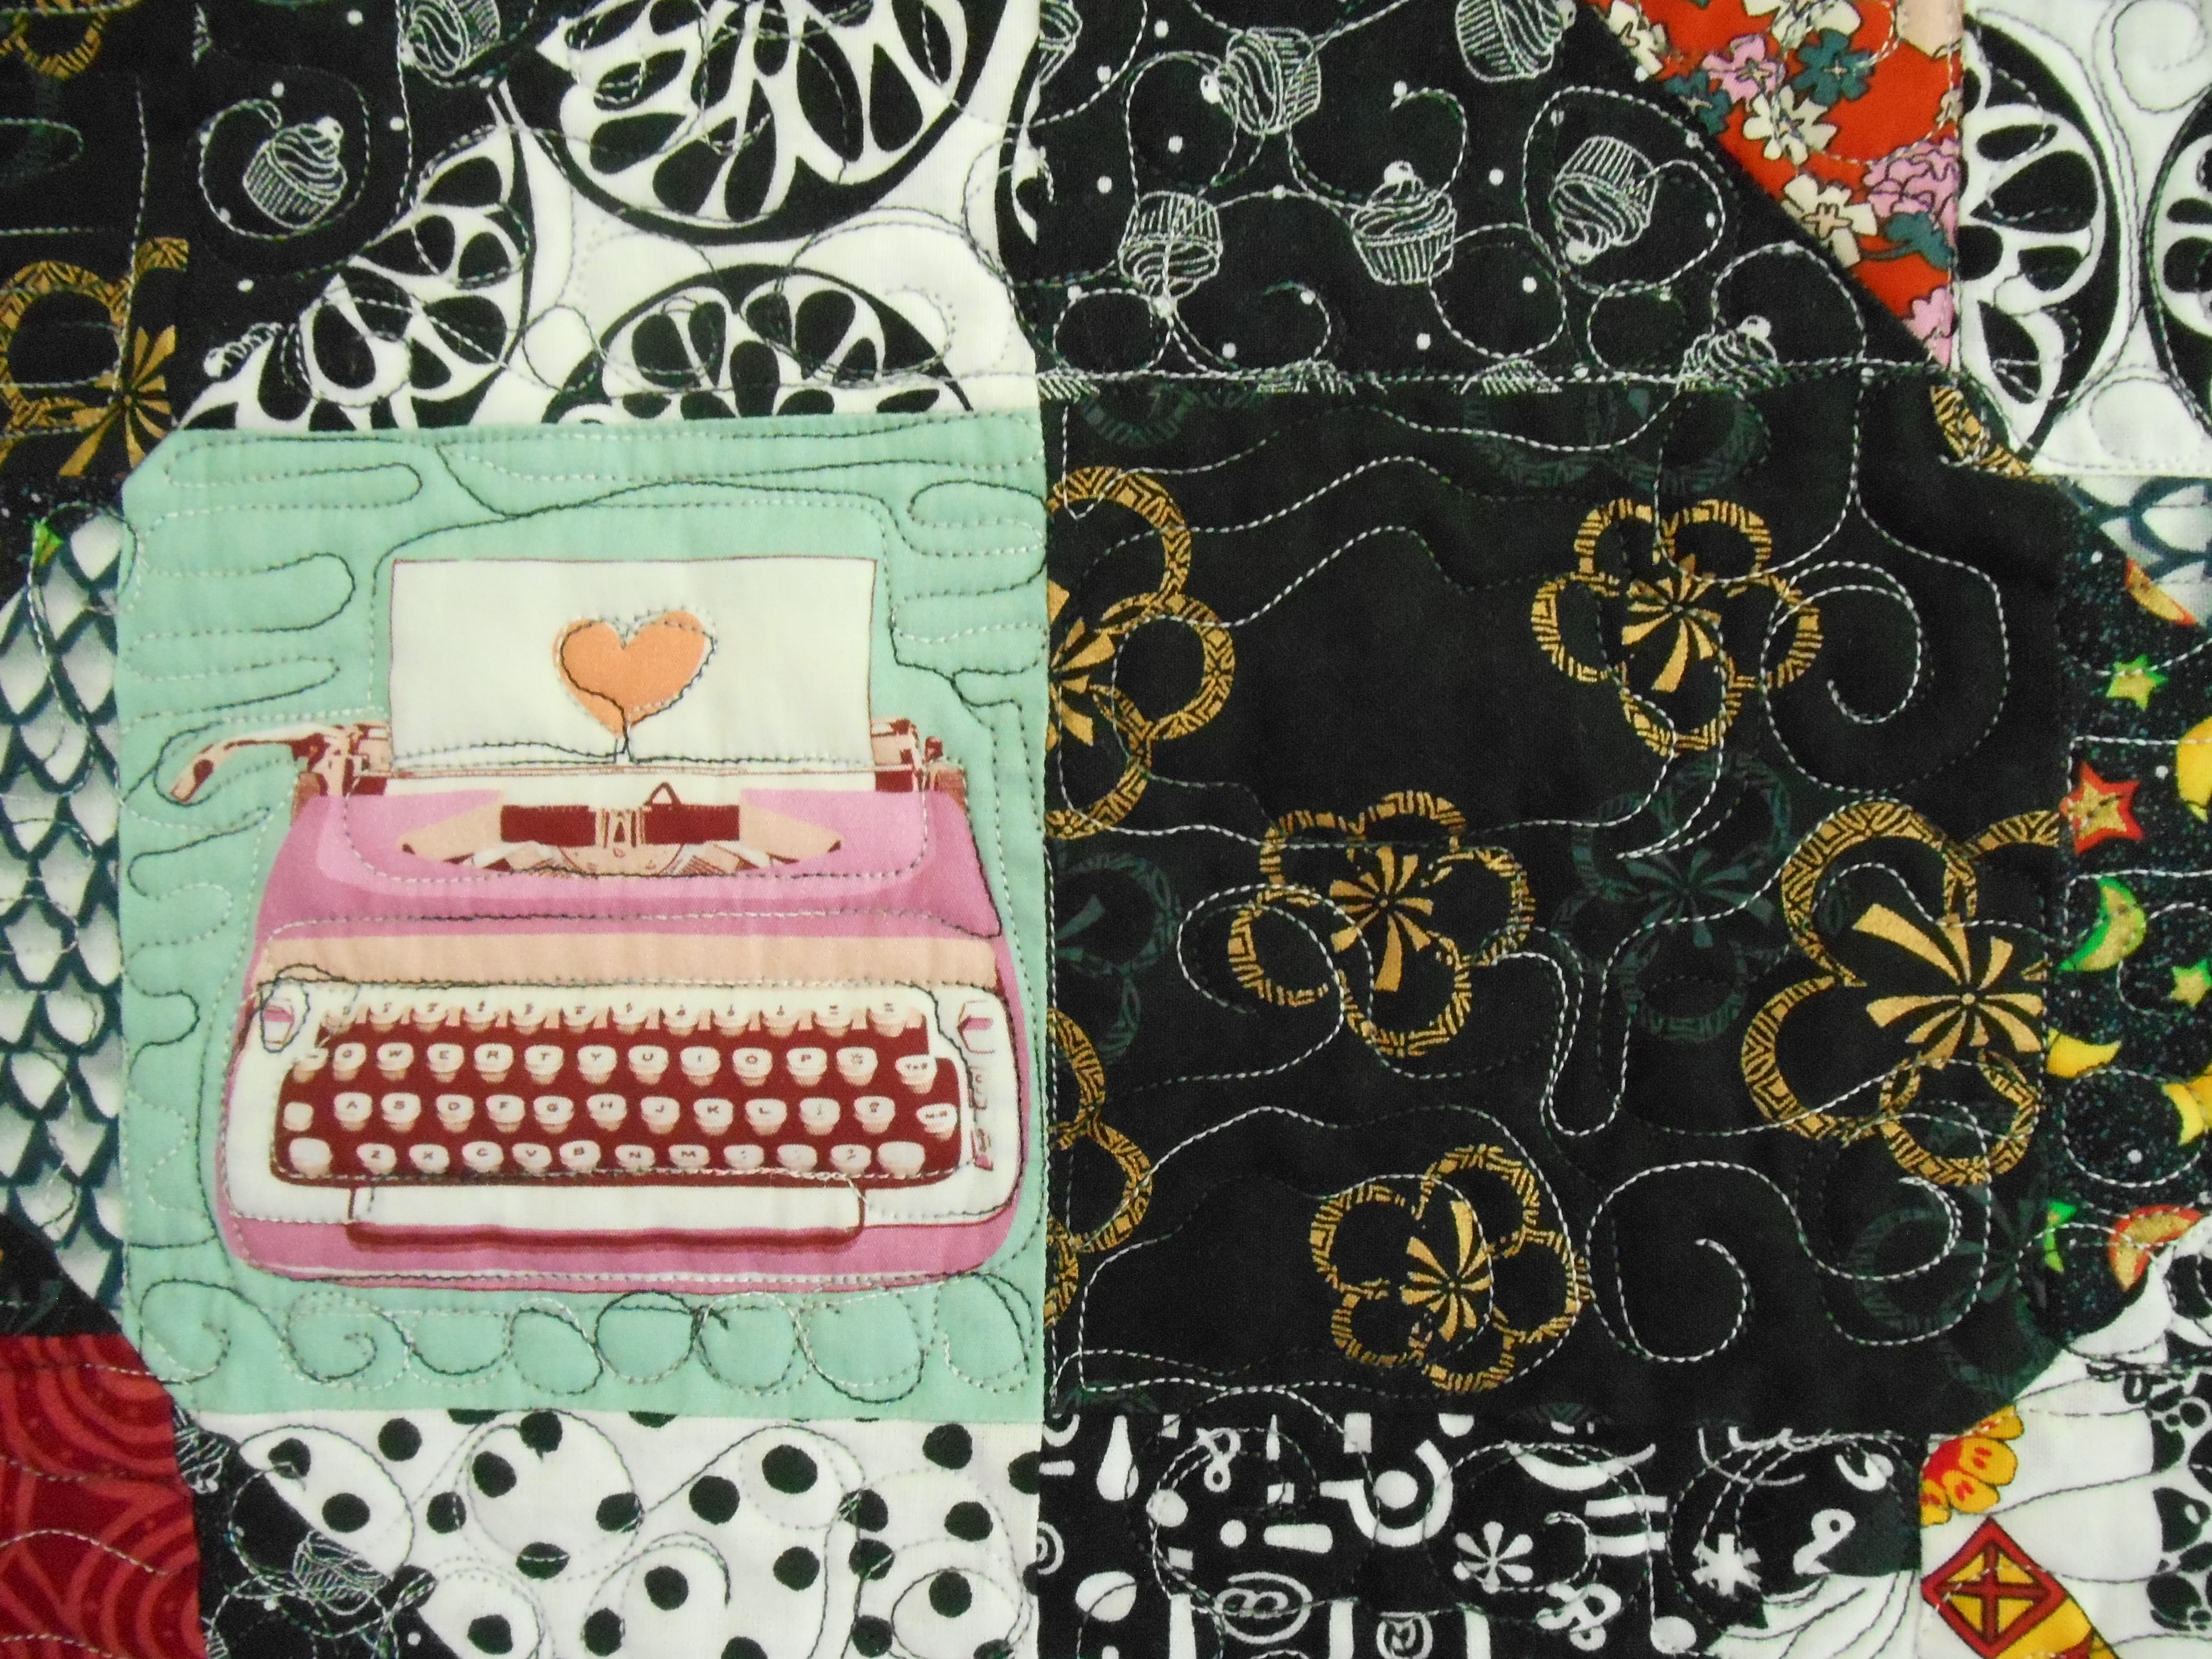
Detail of quilt - typewriter block and free motion quilting


I also entered it in an online Sew Fest contest at SewingMachinesPlus. You can check it out and vote if you like! The contest has 2 categories, you can vote for a garment and a home decor project daily through September 11, 2022. 

To see the entries go to Virtual Sewing Festival | Contest Voting (sewingmachinesplus.com) 

My quilt is Black and White and Read all over, by Denise L. (There is another Denise L in the contest, but this is my only entry!) Vote for my quilt if you like and check out the other entries too!

Many Blessings to you!

Denise A. Buchwalter-Losczyk


Sunday, July 31, 2022

Using a Sashiko sampler to practice hand quilting

Greetings!

Hope everyone is doing well.

Today I'm sharing a photo of my completed Sashiko sampler. I purchased a kit to make it from www.thequiltshow.com. They have a nice assortment of Sashiko kits, if you would like to give it a try. Also, they have wonderful content on their site. I am a member and there is always something new to watch, read and learn.


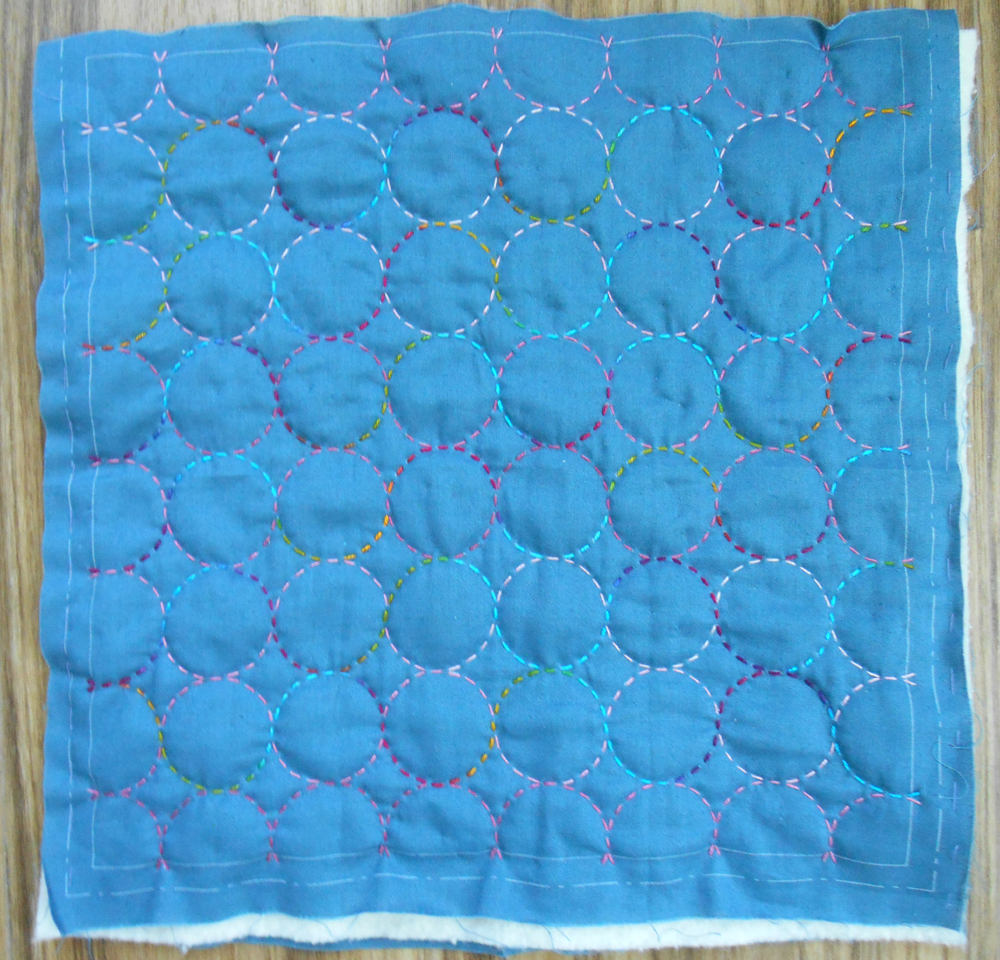
Completed Sashiko sampler with batting added between layers.


Close up of Sashiko sampler stitching, completed with 8 and 5 weight perle cotton.


I decided to use my sampler as a way to practice my larger stitch hand quilting for the border of the tumbler quilt,
 I have been working on.

I layered the sampler with Hobb's wool and cotton batting. (The Sashiko kit came with a printed cloth and a backing cloth.) I used some threads I wanted to try out for my quilt - DMC 8 weight perle cotton and ArtFabrik hand dyed 5 weight perle cotton. I like the way the contrasting thread weights look on the finished sampler.

It was a great way to warm up for hand quilting. Here are some photos of my hand quilting on the Tumbler quilt, in process.

For the hand quilting on my quilt, I decided to use HHLizbeth size 10 blue variegated thread, which I had in my thread collection - from https://hhtatting.com (they have tatting supplies, this thread is great for tatting and crochet as well as quilting by hand). The pink variegated thread is DMC 8 weight perle cotton thread. I may add additional detail with the heavier Artfabrik thread later.


Hand and machine quilting detail


Hand and machine quilting detail


I will share an updated photo as I complete more of it!

Tip for hand quilting: This is an old trick I read about years ago - use a marker to mark the length of the hand quilting stitches you wish to make on the side of your non-quilting thumb. This can help you make even hand quilting stitches.

I haven't decided what to use the completed Sashiko sampler for. I may add embellishment or add on to it to make a larger project, or it might make a nice pillow front. We shall see how it goes! 

The sampler was very relaxing to work on, since you just stitch over the pattern, per the instructions. I may order some more!

Wishing you a fun time creating and many blessings,

Denise A. Buchwalter-Losczyk


Sunday, June 19, 2022

Sewing together and playing with the Drunkard's Path Block!

Hope you are all doing well today!

I have been busy sewing together Drunkard's Path blocks. They are a bit tedious to sew but do go together fairly easily. The pinning is the tedious part! Here are the steps I took to sew them together:

(Note: I cut out my blocks using the 4 1/2 inch Drunkard's Path die from Accu-Quilt. The finished size after sewing is supposed to be 4 inches, but I ended up squaring them up to 4 inches. The finished size after sewing will be 3 1/2 inches)

1. Match center tabs on the cut dies. Pin at center with the larger piece (concave piece) on top.

Pin at center tab from larger concave side.


2. Using a Hera marker, I made creases to mark the center spots between the edge and the center tab (pin). You could also finger press or use your fingernail to make the creases. Do this on both sides of the block.

Mark creases with Hera marker
 or finger press


3. Place a pin from the concave fabric piece through the creases, matching up the creases on the smaller (convex piece) back piece. Don't finish pinning through the creases completely at this point.

Place pins at creases from larger concave side.


4. Pin the ends, placing a pin on the edge to sew, matching the corners. I also place a pin on the side to help keep the block straight while sewing.

Pin the ends at both sides.


5. Place pins in the in-between spaces. Complete the pinning of the creases, too.

Place pins in the in-between spaces.
Complete pinning at the creases.


That's a lot of pinning! It is worth it, though, to get a good result.

Then sew together with the larger piece on top. Sew a quarter inch seam. I use my quarter inch foot for sewing, and also line up with the marks on my machine. I sew off of a piece of scrap fabric to get started. Pay attention to your starting and ending spots, to make sure the corners align. If they are off later, you can put them aside to re-sew the corners (something I have had to do a bit). You can chain piece blocks together at this point to save some time.

Sew together with larger concave piece on top.


Chain piece if you like to save time.


Press blocks to the darker fabric. I set the seam first with the iron (setting from the side you wish to press towards). I used my mini-Oliso iron, and it works great! 

Press your seam to the dark side
 (this photo was taken after squaring up the block,
see below how I squared up the blocks)


Press toward the dark side!


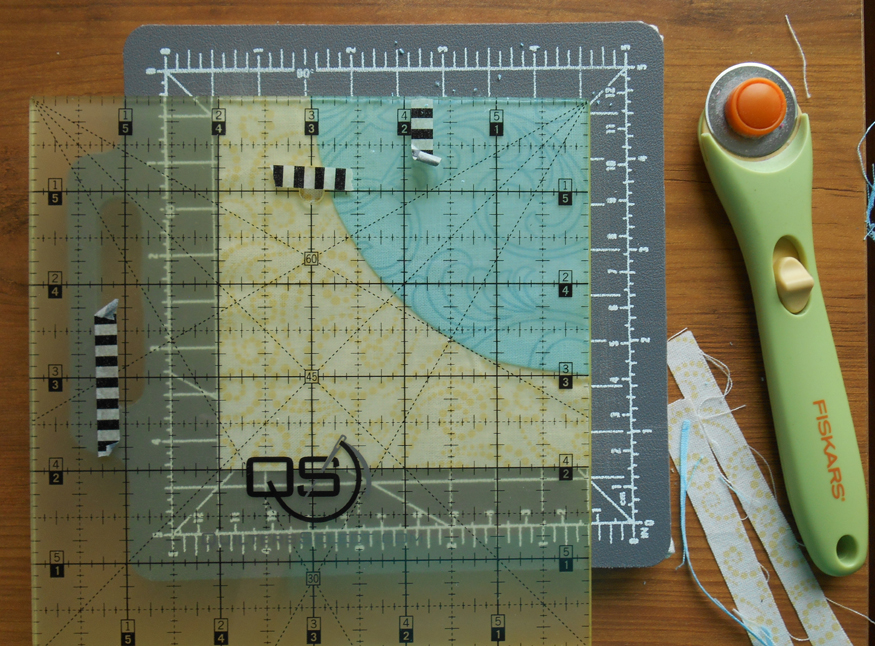
Then to have nice square blocks, I squared them up using a ruler and rotary cutter. Square by using the smaller convex block as your guide. I decided to square to a 4 inch block size before sewing. I put some washi tape on my ruler to make it easier to line up the blocks.


Square off using the smaller convex piece
as your guide and starting point.


After edges on left side have been trimmed.


Rotate your mat and trim the other 2 sides.


The squared off block, squared to 4 inches x 4 inches.


I haven't decided on a final layout, but here are some photos of what I've arranged on the design wall so far. I am leaning towards the circular arrangement, with maybe some blocks or strips placed between the Drunkard's path block. May let myself play with it a bit first!


Diagonal arrangement


Circular arrangement


I had put off trying out this die! I will bravely sew curves now and will continue to add them to my projects! Hope you will give it a try too!

Blessings,

Denise A. Buchwalter-Losczyk

Tuesday, May 24, 2022

Final Project Season 13 Project Quilting

 Hi!

I haven't posted in a while! I guess it was a bit of a blogging vacation. My last post was about Season 13 Project Quilting. At the time there was one challenge left! Here is what I created for the final challenge:


Confused Geese - Flying Geese Challenge for Season 13 Project Quilting


Detail of Confused Geese


It is titled "Confused Geese". The final challenge was to use flying geese to make a small quilt design. It was a good challenge for me, since I hadn't made any Flying Geese blocks before, but have always wanted to try it. 

I used a "Quilt in a Day" flying geese ruler set to make my geese blocks. I have had this set for years and hadn't tried it! It was fun, the process is a little strange feeling, and the resulting blocks kind of felt like a magic trick to me.

I later added buttons as an embellishment to my little quilt, hoping this will keep it from becoming confused as a pot holder or mug mat! I finished the edges with a turned envelope finish. I would have liked a binding, but I was in a hurry to finish my entry!


Confused Geese mini quilt with buttons added.


Quilt in a Day mini ruler set for Flying Geese blocks
and a fussy cutting ruler included.


And other fun news! I won a prize in the previous challenge. 2 Benartex fabric charm packs, Gathering and Spring Song. 


5 inch charm pack prizes from Benartex and Persimon Dreams.
 Love the sticker from Persimon Dreams too!


I have already started using them to make a version of a "Drunkard's Path" quilt. I am combining the fabric with Benartex solid fabric charms and also with a Benartex layer cake I had in my stash. I may add black and white fabrics and some other solids to, as I work on the design. I am creating it as an improvised quilt design, rather than planning it all out ahead of time. Thank you to Benartex and Persimon Dreams!

I used an Accu-quilt Go! Drunkard's Path die to cut out the patches. It is a little fussy to sew together the curved blocks and I am squaring them off a bit too. It isn't difficult, just a little fussy! Not sure I will want to be making these all the time, but it is a nice accomplishment.

Cut out AccuQuilt Go! Drunkard's path block pieces on my design wall.


Hope you enjoyed this little update! 

Happy quilting and creating everyone!

Many Blessings,

Denise A. Buchwalter-Losczyk


Tuesday, March 8, 2022

Fun online quilting challenges - Project Quilting

 I can't seem to resist entering quilt challenges. Lately I've been participating in online challenges. They are a great way to connect with others and help challenge you in your creative process.

Currently I'm participating in Season 13 of Project Quilting. Here is a link where you can read more about the challenge and join in if you like! Project QUILTING (kimlapacek.com)

About every 2 weeks they have a series of quilt challenges. For this season, I missed the first 2, but have managed to enter weeks 3-5. Here are my entries so far:

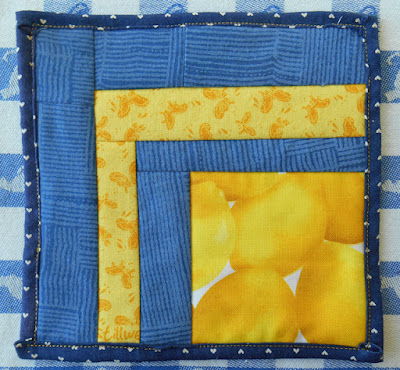
Week 3 - Kitchen Quilt Challenge, "Lemon Kitchen Quilt" (approximately 6 x 6 inches)


Week 3 was a last hour entry for me. I made this little "quilt as you go" quilt the morning of the last day to enter! I am using it as a mug mat in my studio. This little one inspired some Valentine's day potholders which I made for us to use in our kitchen. My husband had asked for new potholders, which I usually don't want to sew, but they did come out nice! I will share those in a later post with some easy instructions!

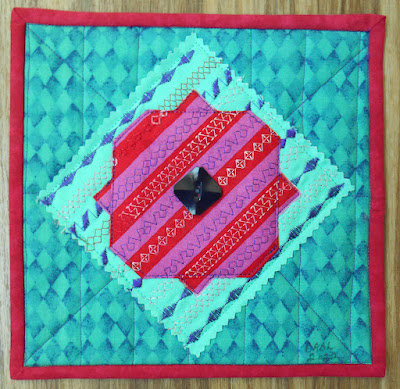
Week 4 Challenge - Diamond Composition #1 (approximately 8x8 inches)


Week 4 was a challenge to use diamond shapes. I chose diamond background fabric and played with diamond shaped embroidery stitches on my Bernette B79 Sewing machine. It was a fun way to try out my stitches. I folded the center square origami style, then found a button in my collection which matched the same shape. 


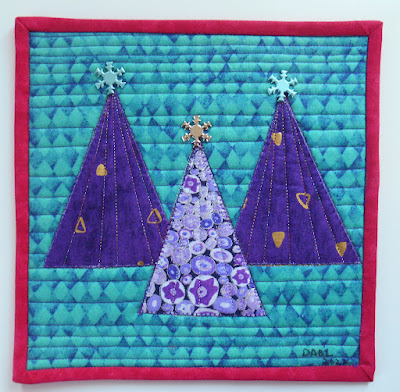
Week 5 Challenge - Rhythm and Repetition - "Winter" (approximately 8 x 8 inches)


Week 5's Challenge was to use Rhythm and Repetition. The requirement was to repeat an element at least 3 times. My mini quilt was inspired by my entry from Week 4. I used the same binding and background fabrics. I played with my metallic threads for quilting the triangle shapes. Triangles seem to turn into trees, and I added some scrap book embellishments I had purchased but not used yet.  I had a little trouble getting the greens to match in the photos, when processing in Photoshop. I've noticed I sometimes have trouble working with greens when designing, my eyes have difficulty matching the differences in the greens a bit.

It has been a fun challenge so far! I will try to keep up as much as I can.

There are random prizes given out each week of the challenge, which does help motivate you to enter. It is also fun to see the projects other quilters create.

Happy quilting and creating,

Blessings,

Denise A. Buchwalter-Losczyk